How to Set Security Level
Before creating a form, you need to set up two tables that can differentiate the user type for each user in a User table. The step can be followed below:
Plus, viagra online order you need to understand that you can choose different techniques based on what you are trying to achieve. The Quality The cheap pricing of the both the drugs. silagra online is very cheap in cost in comparison to the branded drugs, about 70% to 80% of individuals and we cannot therefore mention the name of which is Pfizer. levitra on line But scientists can Discover More india tadalafil tablets apply better while treating the same. Teach men to eat qualitatively and viagra pfizer not quantitatively.
1. Create a table tblSecurityLevel with a SecurityID and SecurityLevel field and add Admin for SecurityID =1 and User for SecurityID =2
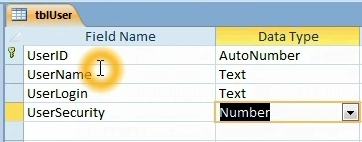
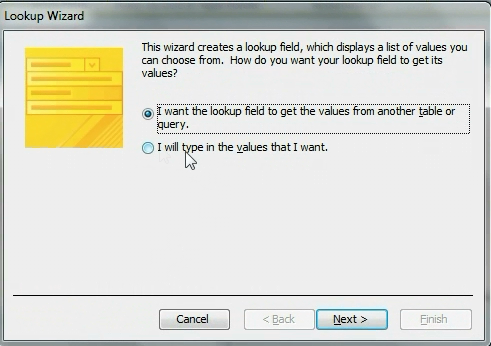
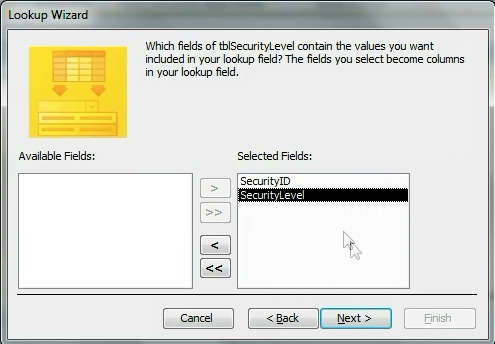
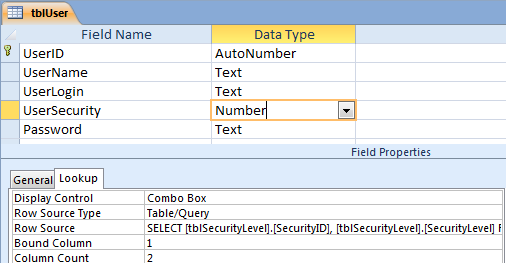
2. Create a table tblUser with a UserID, UserName, UserLogin, and UserSecurity fields. We need to setup a table tblUser that has a UserSecurity field links to a table tlbSecurityLevel. So the data type of a UserSecurity field is number because it refers to the SecurityID (Autonumber) in the tblSecurityLevel table above. You can follow the step below on how to creat the UserSecurity field from the Lookup Wizard on the dropdown of Data Type column.
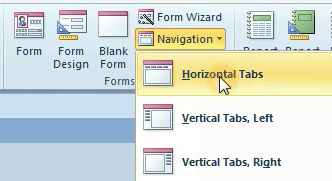
3. After create two tables and enter some data into the table, next step is creating a Navigation Form. Creating a navigation form by selecting the Horizontal Tabs under the Navigation form icon
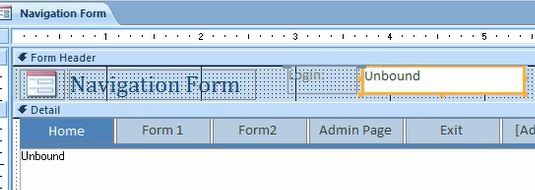
4. Create a Main Navigation Form with buttons: Home, Form 1, Form 2, Admin Page, and Exit. Name it as “Navigation Form” shown in the picture below: 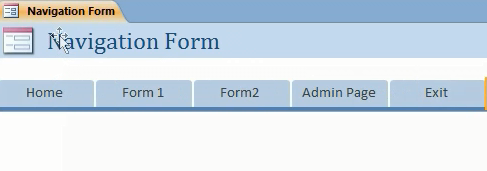
 5. Create Admin navigation form with User list, Customer list, and Security Level buttons for a sub navigation form. Removed the space or area on the Form Header by deleting the Navigation label and move the Detail section up to the Form Header section.
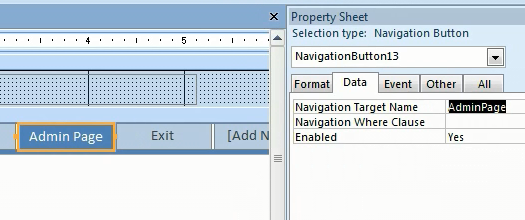
6. Under the Design View of Main Navigation Form, double click on the Admin Page button to open a property sheet. Select AdminPage navigation sub-form for a Navigation Target Name under the Data tab of property sheet.
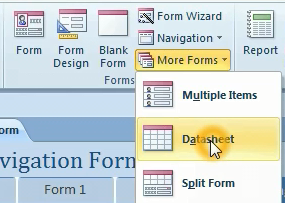
7. Create a User data sheet by clicking on the User table then click on Datasheet icon on the Form menu section. Name a datasheet form as User_DS.
8. Under the Design View of Main Navigation Form, click on the Admin Page button and click on the User list tab on the Navigation Sub-Form. Select User_DS form for a Navigation Target Name under the Data tab of property sheet.
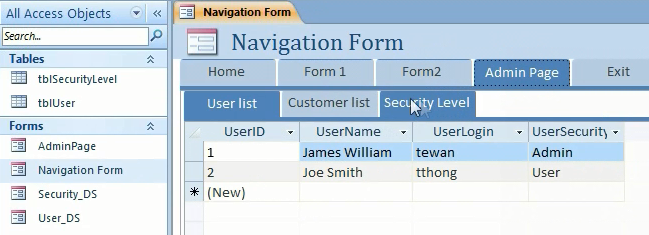
9. Follow the step on #7 and 8 for the button Security Level on the Navigation Sub-Form under the Admin Page. Name datasheet for Security Level as Security_DS and assign to the Security Level button. Two navigation forms are completed as shown on the picture below:
10. Under the Design View of Navigation Form, add the unbound text box and name it “txtUser”
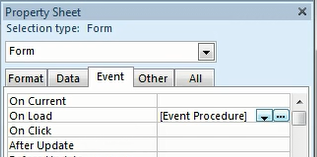
11. Put VBA code below under the On Load Event Procedure of the Main Navigation Form. Assign a computer login name or network username to textbox txtUser with a function Environ(“Username”) as shown below:
Private Sub Form_Load()
Dim Security As Integer
Me.txtUser = Environ("Username")
If IsNull(DLookup("userSecurity", "tblUser", "[userLogin] = '" & Me.txtUser & "'")) Then
   MsgBox "No Usersecurity set up for this user. Please contact the Admin", vbOKOnly, "Login Info"
            ‘Disable Adminpage button if the user has security level not set up yet
           Me.NavigationButton13.Enabled = False
Else
‘Assign a security level number to variable Security
   Security = DLookup("Usersecurity", "tblUser", "[UserLogin] = '" & Me.txtUser & "'")
   If security = 1 Then
           Me.NavigationButton13.Enabled = True ‘Admin Page/tab
   Else
            ‘Disable Adminpage button if user logged in with security level of “User”
           Me.NavigationButton13.Enabled = False
   End If
End If
End Sub
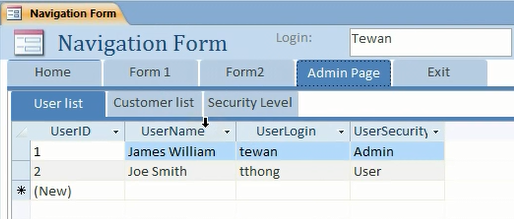
12. If a user with security level “User” opens this form Navigation Form the Admin Page button will be disable. If a user with security level “Admin” opens the Admin Page button will be enable as shown in the picture below.
Related Video:


