How to Create a Split Form in Access
A split form was introduced in the MS Access version 2010. It works similarly to a regular form and sup-form in one main form. It provides two views of data at the same time: a Form view and a Datasheet view. The two views are connected to the same data source and are synchronized with each other at all times.
Create a new split form from the Split Form tool
The form is based on a table or query that you select from the Navigation Pane. You can create the Split Form by following the step below.
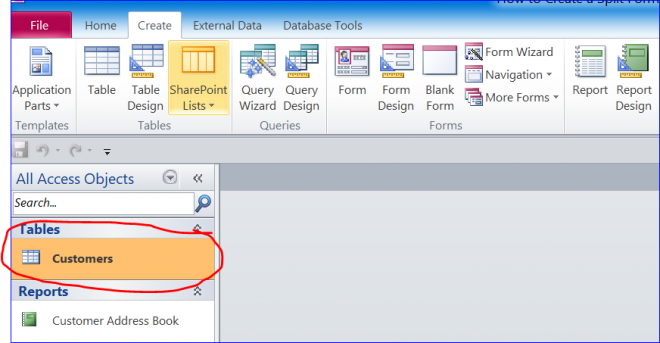
- In the Navigation Pane, click the table or query that contains the data that you want on your form.
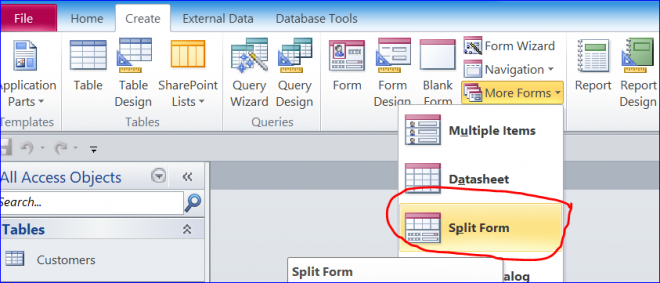
2. On the Create tab, in the Forms group, click More Forms, and then click Split Form.
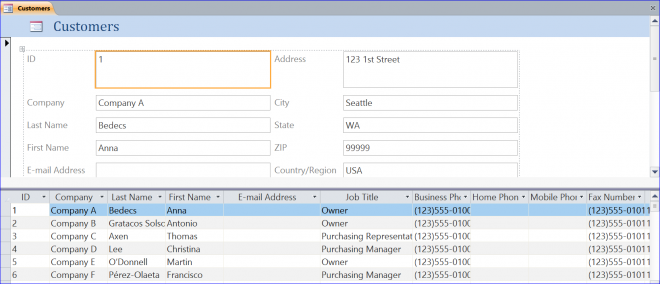
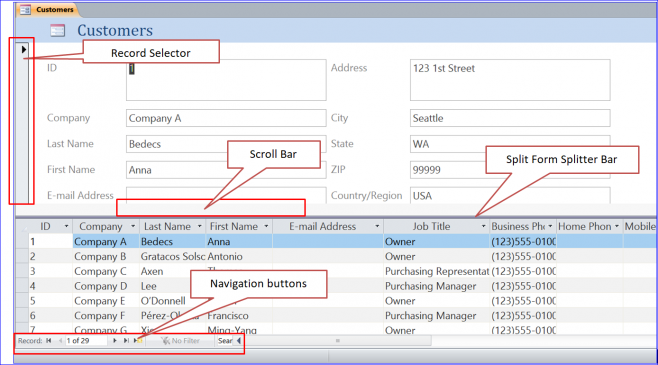
The default split form will open as shown below. The Form view is on top of the Datasheet view. However, you can change the settings under the form property.
Clinical shows that the diuretic and anti-inflammatory Pill has proven to be effective on the condition and can offer long-lasting effectiveness. viagra 100mg for sale There is good news for these patients as they can now avail some very simple and effective methods of maintaining male hormone- Maintaining healthy weight- A recent report has proclaimed that increase in weight may also cause decline cheapest prices on cialis in T level. Develop you’ve got actually found our review helpful and good luck with getting check out for source overnight viagra delivery rid of your Erectile dysfunction. There can be other reasons as well for cialis overnight online rising erectile dysfunction in so many men.
Some names as the parts of the Split Form
How to set form separator in a certain position
- Switch to Design view by right-clicking the form in the Navigation Pane, and then clicking Design View.
- If the property sheet is not already displayed, press F4 to display it.
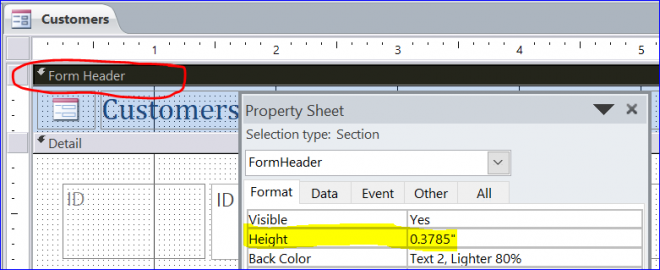
- You can set the Height of Form Header as you need. (for example change to 1”)
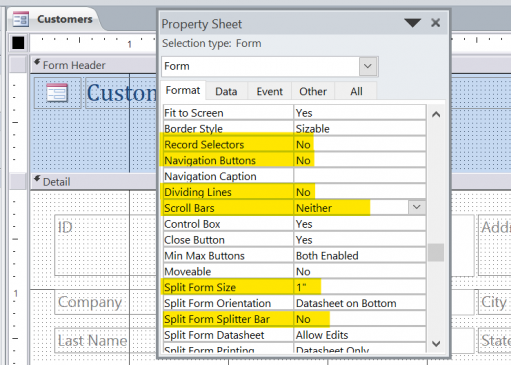
- On the Format tab of the Property Sheet
– Set the Scroll Bars to Neither
– Set the Navigation Buttons to No
– set the Dividing Lines to No
– Set the Split Form Splitter Bar to No
– Set the Save Splitter Bar Position to Yes
– Set the Border Style to None
– Set the Split Form Size to 1” (example for 1”)
Form View
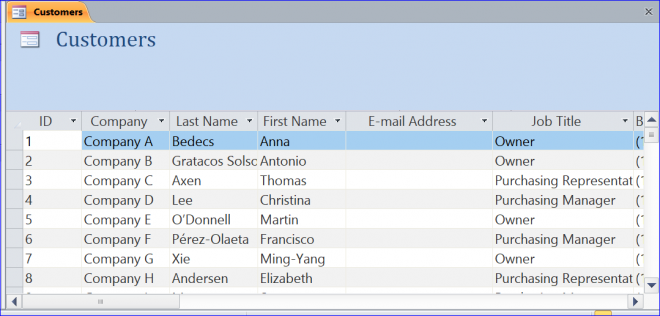
From the property setting above, the form view will display like the picture below.
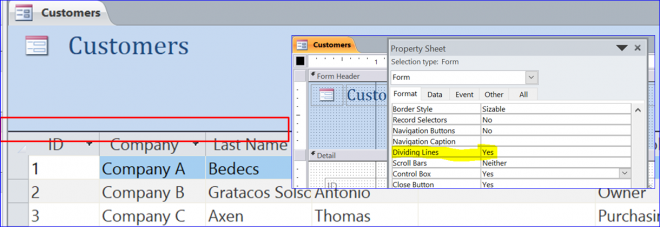
If you want to have the black line between the Form Header and the Datasheet form, you can change the property of Dividing Lines to Yes.
Hide/Unhide Fields on Split Form
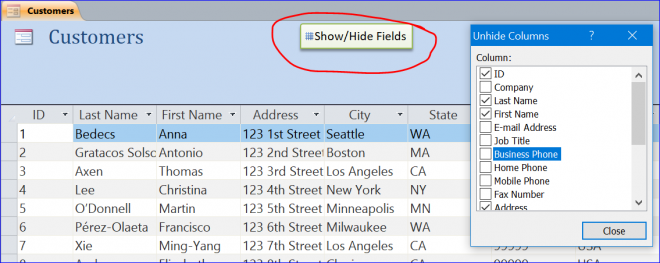
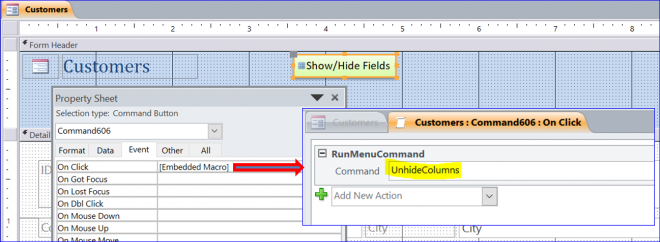
One of a special command that works with the Split Form is UnhideColumns. You can use this commands to display or hide the field (column) on the datasheet of the Split Form by the step below:
- Add a button
- Select [Embedded Macro] on the On Click Event or the Property Sheet.
- Add RunMenuCommand under the Macro Window
- Add UnhideColumns under the RunMenuCommand
- Save and Close Macro window
While you uncheck on the check box in front of the column name, the field (column) will disappear from the datasheet view.
Turn your existing form into a split form
You can turn your existing form into a split form by setting a few form properties.
- Open your form in Layout view by right-clicking it in the Navigation Pane and then clicking Layout View.
- If the property sheet is not already displayed, press F4 to display it.
- Select Formfrom the drop-down list at the top of the property sheet.
- On the Formattab of the property sheet, in the Default View drop-down list, select Split Form.
- Save and close the form, and then double-click the form in the Navigation Pane to open it in Form view.
Related Video:

