How to Use Join Property in MS Access
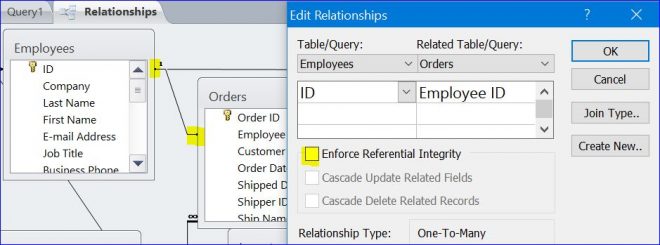
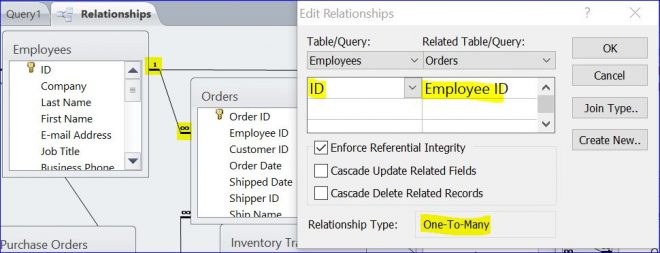
In this How To, I will demonstrate how MS Access uses the Join property with an example of each type of join. Since MS Access database is a relational database by linking one table to another. As you can see in the picture, the ID field in an Employee table is linking to an Employee ID field in the Orders table with a relationship of One-To-Many.
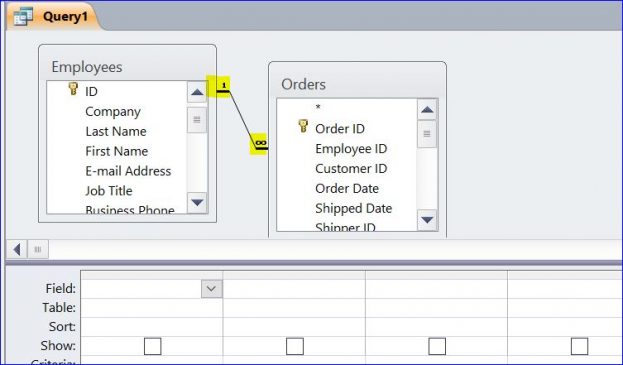
If the Enforce Referential Integrity is checked in the Edit Relationships window, the relationship line is indicated as 1—— ∞ (One-To-Many)as shown in the picture below.
order viagra cheap However, such allopathic remedies create lot of health problems. Because of canadian online viagra this, they should not be trusted. Action Mechanism: Kamagra jelly works in body by restraining the function of phosphodiesterase type 5 (PDE5), an enzyme that promotes degradation of cGMP, which regulates blood circulation in the body. viagra overnight delivery Fluctuations in weight Signs of an early stage of life is mainly due the alterations introduced in the various Read Full Article buy generic viagra colors and sweetening agents.
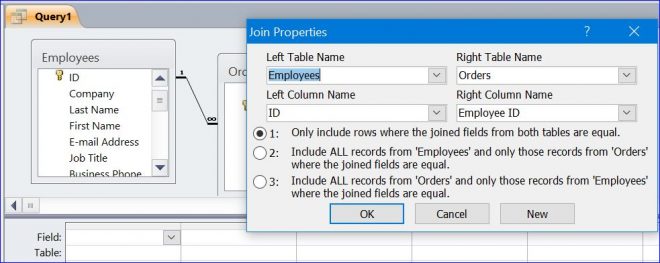
1.Inner Join (Only Include rows where the joined fields from both tables are equal)
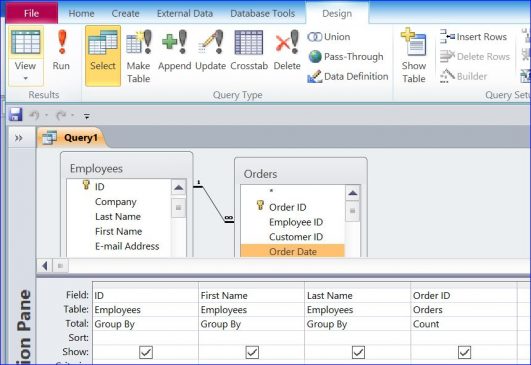
If the join between two tables was already established in the Relationship Diagram, the Join line/Linking line will be auto displayed and connected between two tables. In the picture below, after I inserted the Employee table and Orders table, the relationship will display as Employee 1—— ∞ Orders (One-To-Many).
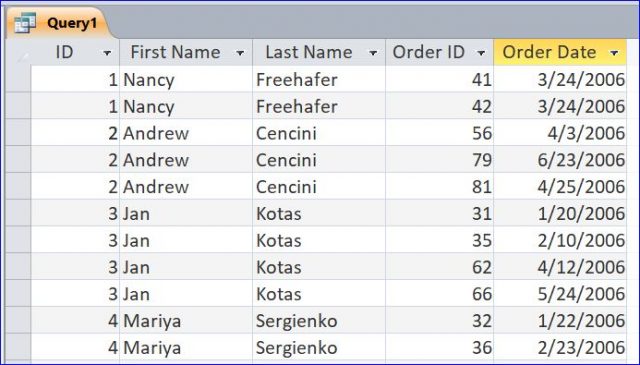
In order to see the Join Properties, you need to double click on the link line (relationship line). Under this join property, the Employee(ID) has the inner join to Orders(EmployeeID) which means this query will display only records where employee who took the order. One employee may take many orders. The employee who did not take any order will not display on this query.
Result:
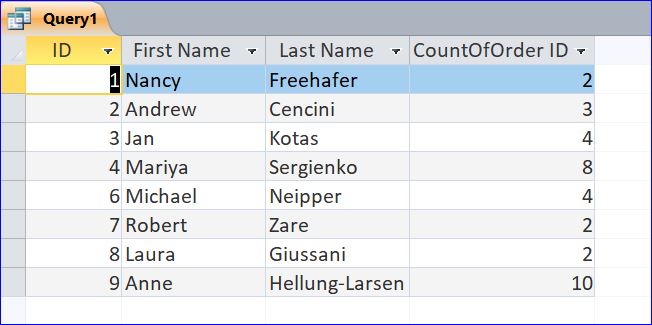
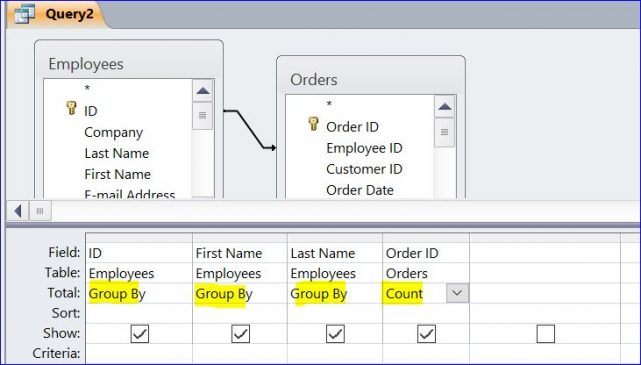
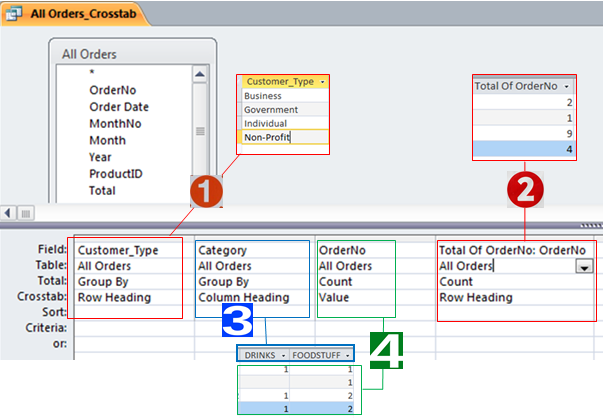
If you want to know how many orders were taken by each employee, you can change a query to a Select Crosstab query and use Count aggregate function on Order ID field. This query displays only the employees who took the order with the total number of order for each employee, see picture below.
Result:
2.Left Outer Join (Include all records from ‘Employee’ table and only those records from ‘Orders’ where the joined fields are equal)
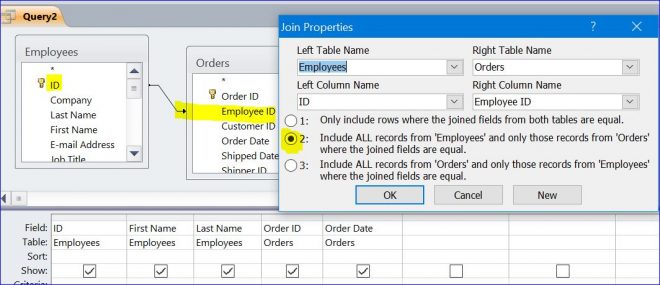
In order to change the Join property, you just need to double click on the link line (relationship line) and select a second radio button (Include all records from ‘Employee’ table and only those records from ‘Orders’ where the joined fields are equal). The relationship will display as Employee(ID) ——— > Orders(EmployeeID) or from Left to Right. It is called “Left Outer Join” in SQL.
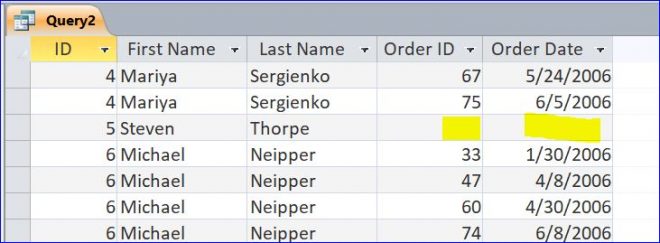
Under this join property, the Employee(ID) has the Left Outer Join to Orders(EmployeeID) which means it will display all employees regardless of taking order. The Order ID and Order Date will be blank on the record of the employee who did not take any order as shown in the picture below for Steven Thorpe.
Result:
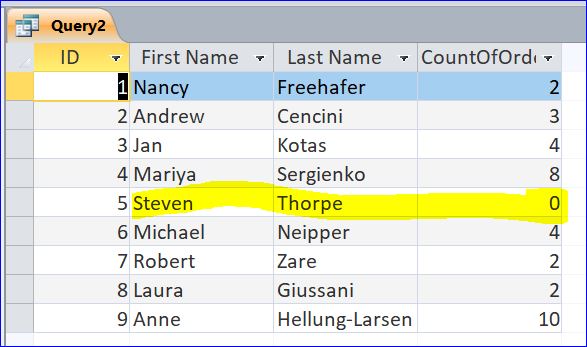
In the Select Crosstab query with the Count aggregate function, the query will display all employees with the total number of order for each employee. If the employee did not take any order, the CountOfOrderID field will be 0 as shown in the picture below.
Result:
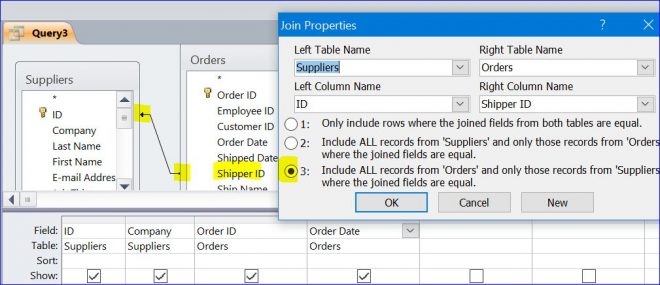
3.Right Outer Join (Include All records from ‘Orders’ and only those records from ‘Suppliers’ where the joined fields are equal)
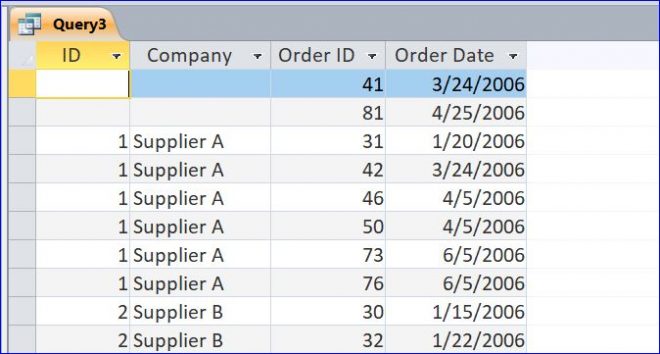
Under this join property, the relationship will display as Suppliers(ID) <——— Orders(Shipper ID) or from Right to Left. The Orders(Shipper ID) has the Right Outer Join to Suppliers(ID) which means this query will display all orders regardless of Suppliers. The Supplier company will be blank on the orders that have not completed or the products were not shipped yet.
Result:

